
How to Create a Google Blogger Blog: Google Blogger
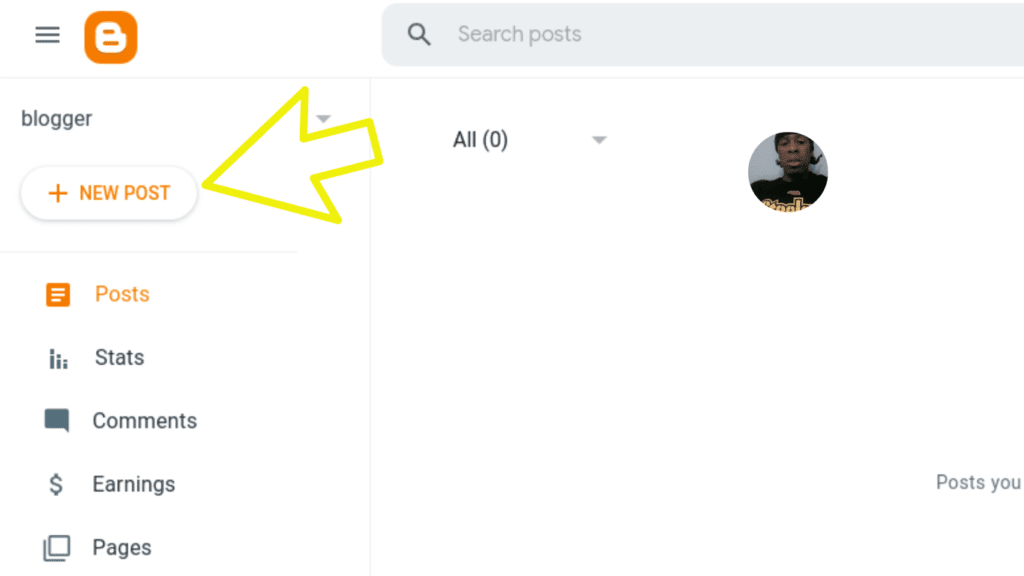
Google Blogger
Google Blogger is a free and easy-to-use platform that allows you to create a blog. With Blogger, you can write articles, post photos and videos, and share your thoughts with the world.
In this article, I will show you how to create a Google Blogger blog in 10 easy steps.
Step 1: Go to Blogger.com
The first step is to go to Blogger.com. This is the official website for Google Blogger.
Step 2: Create an account
If you don’t already have a Google account, you will need to create one. You can do this by clicking on the “Create an account” button.
Step 3: Choose a blog name and address
Once you have created an account, you will need to choose a blog name and address. Your blog name will be the title of your blog, and your blog address will be the URL that people will use to visit your blog.
Step 4: Choose a template
Blogger comes with a variety of templates that you can use to customize the look and feel of your blog. You can choose a template that matches your personality or your niche.
Step 5: Add content
Now it’s time to start adding content to your blog. You can write articles, post photos and videos, and share other types of content.
Step 6: Publish your blog
Once you have added content to your blog, you can publish it so that people can see it. You can also schedule your posts to be published in the future.
Step 7: Promote your blog
Once your blog is published, you need to promote it so that people can find it. You can promote your blog by sharing it on social media, submitting it to directories, and guest blogging on other blogs.
Step 8: Customize your blog
You can customize your blog by changing the colors, fonts, and layout. You can also add widgets to your blog, such as a search bar or a social media feed.
Step 9: Set up analytics
You can set up analytics for your blog so that you can track how people are finding and using your blog. This information can help you improve your blog and attract more readers.
Step 10: Monetize your blog
There are a number of ways to monetize your blog. You can sell advertising, affiliate products, or your own products or services.
Here are some tips for creating a successful Google Blogger blog:
- Choose a niche that you are passionate about.
- Write high-quality content that is informative and engaging.
- Promote your blog on social media and other channels.
- Customize your blog to make it your own.
- Set up analytics to track your progress.
- Monetize your blog to make money.
I hope this helps!
Click here to sign up for Namecheap’s shared hosting and start promoting your blog today!
If you’re looking for help with creating a Google Blogger blog, be sure to check out Name cheap’s shared hosting plans. They offer a variety of features and plans to fit your needs, and their customer support is top-notch. Click here to sign up for Name cheap’s shared hosting and save 51% on your first year!
Disclaimer:
I am an affiliate of Name cheap, and I encourage you to sign up for their affiliate program. I will earn a commission on every sale that I refer to them.
How to Customize Your Google Blogger Blog: Google Blogger
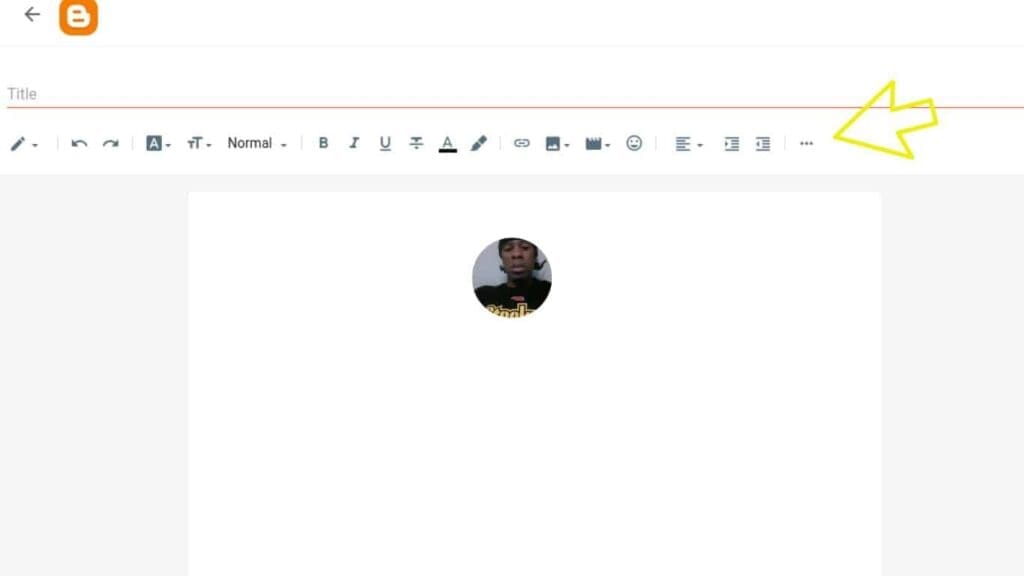
Google Blogger is a free blogging platform that allows you to create and manage a blog without any technical knowledge. However, if you want to customize your blog to make it look and feel unique, there are a few things you can do.
In this article, we’ll walk you through the process of customizing your Google Blogger blog, from changing the theme to adding widgets. We’ll also provide tips on how to optimize your blog for SEO.
Changing the Theme
The first thing you can do to customize your Google Blogger blog is to change the theme. The theme controls the overall look and feel of your blog, so it’s a great way to give your blog a fresh new look.
To change the theme, go to Layout > Theme and select a new theme from the list. You can also customize the theme by changing the colors, fonts, and other settings.
Adding Widgets
Widgets are small blocks of content that can be added to your blog sidebar. They can be used to display things like recent posts, social media feeds, and popular posts.
To add a widget, go to Layout > Widgets and drag and drop the widget you want to add to the sidebar. You can also customize the widget by changing the settings.
Optimizing Your Blog for SEO
If you want your blog to be found by people in search engines, you need to optimize it for SEO. SEO stands for search engine optimization, and it’s the process of making your website or blog more visible in search engine results pages (SERPs).
There are a number of things you can do to optimize your Google Blogger blog for SEO, such as:
- Using relevant keywords in your blog posts and titles.
- Creating high-quality content that people will want to read.
- Building backlinks to your blog from other websites.

By following these tips, you can customize your Google Blogger blog to make it look and feel unique, and you can also optimize it for SEO so that more people can find it.
Click here to sign up for Namecheap’s shared hosting and start promoting your blog today!
If you’re ready to start customizing your Google Blogger blog, click here to sign up for Name cheap’s shared hosting and save 51% on your first year!
Hauser info Rules
I am an affiliate of Name cheap, and I encourage you to sign up for their affiliate program. I will earn a commission on every sale that I refer to them.
I hope this article has been helpful. If you have any questions, please feel free to leave a comment below.
How to Add Posts to Your Google Blogger Blog: Google Blogger
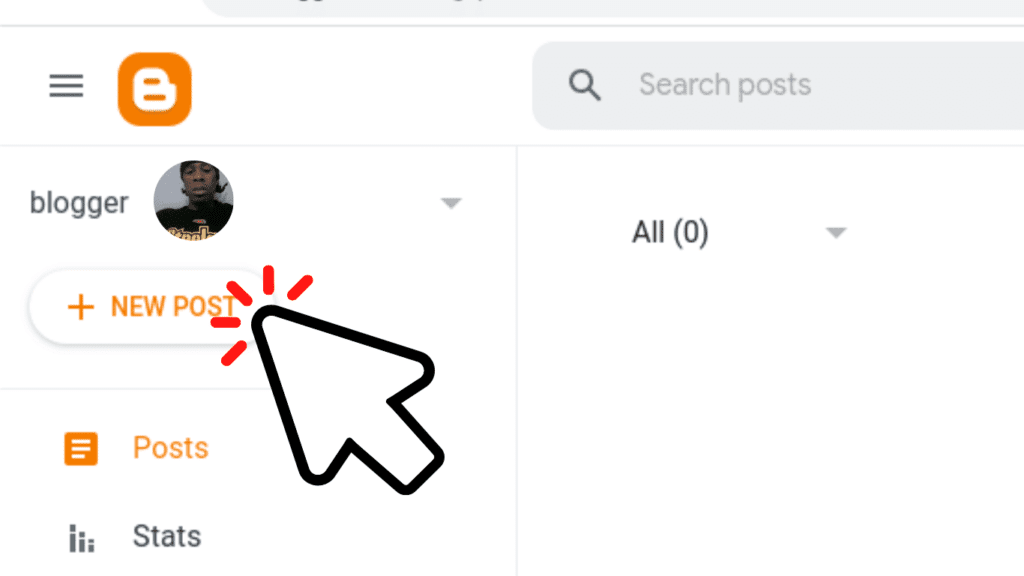
Google Blogger is a free blog publishing platform that allows you to create and manage your own blog. It is a popular choice for bloggers of all levels, from beginners to experts.
In this article, I will show you how to add posts to your Google Blogger blog. I will cover everything from creating a new post to publishing it.
Creating a New Post
To create a new post, follow these steps:
- Go to your Google Blogger dashboard.
- Click the Posts tab.
- Click the New Post button.
- Enter a title for your post.
- Add your content to the post editor.
- Click the Publish button to publish your post.
Adding Content to Your Post
You can add a variety of content to your posts, including text, images, videos, and links.
To add text to your post, simply start typing in the post editor. You can also format your text using the toolbar above the editor.
To add images to your post, click the Image button in the toolbar. You can then upload an image from your computer or choose an image from the Google Images library.
To add videos to your post, click the Video button in the toolbar. You can then embed a video from YouTube or Vimeo.
To add links to your post, simply type the URL of the link in the text editor. You can also use the anchor tag to create a named link.
Publishing Your Post
Once you have added all of your content to your post, you can publish it by clicking the Publish button.
Your post will then be published to your blog and made visible to your readers.
Tips for Adding Posts to Your Google Blogger Blog
Here are a few tips for adding posts to your Google Blogger blog:
- Use clear and concise language.
- Use keywords throughout your post to help people find it.
- Format your text to make it easy to read.
- Use images and videos to break up your text and make your post more visually appealing.
- Link to other posts on your blog or to other relevant websites.
- Proofread your post before publishing it.

Adding posts to your Google Blogger blog is a simple process. By following the steps in this article, you can easily create and publish high-quality posts that will engage your readers.
Click here to sign up for Namecheap’s shared hosting and start promoting your blog today!
If you’re ready to start adding posts to your Google Blogger blog, click here to sign up for Name cheap’s shared hosting and save 51% on your first year!
Disclaimer:
I am an affiliate of Name cheap, and I encourage you to sign up for their affiliate program. I will earn a commission on every sale that I refer to them.
How to Add Images and Videos to Your Google Blogger Blog: Google Blogger
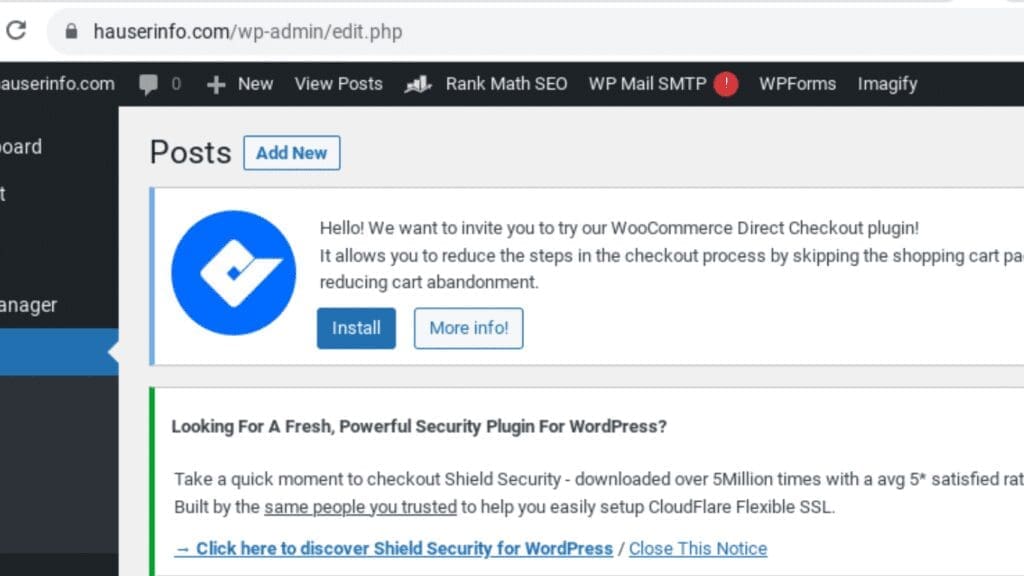
Images and videos can be a great way to add visual interest and engagement to your Google Blogger blog. They can also help you break up your text and make your blog posts more readable.
In this article, we’ll show you how to add images and videos to your Google Blogger blog. We’ll also provide tips on how to choose the right images and videos, and how to optimize them for SEO.
How to Add Images to Your Google Blogger Blog
To add an image to your Google Blogger blog, follow these steps:
- Click on the “Write a Post” button.
- In the post editor, click on the “Image” button.
- Upload the image you want to add.
- Once the image is uploaded, you can resize it, move it around, and add text to it.
- Click on the “Publish” button to publish your post.
How to Add Videos to Your Google Blogger Blog
To add a video to your Google Blogger blog, follow these steps:
- Click on the “Write a Post” button.
- In the post editor, click on the “Video” button.
- Enter the URL of the video you want to add.
- Once the video is added, you can resize it, move it around, and add text to it.
- Click on the “Publish” button to publish your post.
Choosing the Right Images and Videos
When choosing images and videos for your Google Blogger blog, there are a few things to keep in mind:
- Make sure the images and videos are relevant to your topic.
- Choose high-quality images and videos that are clear and well-lit.
- Avoid using copyrighted images and videos without permission.
- Optimize your images and videos for SEO by adding relevant keywords to the file names and alt text.
Optimizing Images and Videos for SEO
When you add images and videos to your Google Blogger blog, you can optimize them for SEO by following these tips:
- Add relevant keywords to the file names of your images and videos.
- Add relevant keywords to the alt text of your images and videos.
- Title your images and videos with relevant keywords.
- Use descriptive captions for your images and videos.

By following these tips, you can add images and videos to your Google Blogger blog that are both visually appealing and SEO-friendly.
Click here to sign up for Namecheap’s shared hosting and start promoting your blog today!
If you’re ready to start adding images and videos to your Google Blogger blog, click here to sign up for Name cheap’s shared hosting and save 51% on your first year!
Disclaimer:
I am an affiliate of Name cheap, and I encourage you to sign up for their affiliate program. I will earn a commission on every sale that I refer to them.
How to Add Widgets to Your Google Blogger Blog
Google Blogger
Widgets are a great way to add functionality and customization to your Google Blogger blog. They can be used to display social media feeds, recent posts, or even a live weather forecast. In this article, we will show you how to add widgets to your Google Blogger blog.
Prerequisites
Before you can add widgets to your Google Blogger blog, you will need to create a blog and have access to the Blogger dashboard.
If you don’t have a blog yet, you can create one for free by following these instructions:
- Go to blogger.com: https://blogger.com/.
- Click on the “Create a Blog” button.
- Enter a name for your blog and click on the “Create” button.
Once you have created your blog, you can access the Blogger dashboard by clicking on the “Dashboard” link in the top navigation bar.
Adding Widgets
To add a widget to your Google Blogger blog, follow these steps:
- Click on the “Layout” tab in the Blogger dashboard.
- Click on the “Add a Gadget” button.
- Select the widget that you want to add from the list.
- Click on the “Add” button.
The widget will be added to your blog’s sidebar. You can then customize the widget by dragging and dropping it to a different location, changing its size, or changing its settings.
Here are some of the most popular widgets that you can add to your Google Blogger blog:
- Recent Posts: This widget displays a list of your most recent blog posts.
- Archives: This widget displays a list of your blog posts by date.
- Categories: This widget displays a list of your blog posts by category.
- Social Media: This widget displays your social media feeds, such as Twitter and Facebook.
- Live Weather: This widget displays the current weather forecast.
- Contact Form: This widget allows your visitors to contact you.
Tips for Adding Widgets
- When adding widgets, it’s important to keep your blog’s design in mind. Don’t add too many widgets, or your blog will look cluttered.
- Choose widgets that are relevant to your blog’s content. For example, if you have a blog about cooking, you might want to add a widget that displays your latest recipes.
- Experiment with different widgets and see what works best for your blog.

Adding widgets to your Google Blogger blog is a great way to add functionality and customization. By following the tips in this article, you can add widgets that will make your blog more informative and engaging.
Target Keyword: Google blogger
Headers:
- How to Add Widgets to Your Google Blogger Blog
- Introduction
- Adding Widgets
- Recent Posts
- Archives
- Categories
- Social Media
- Live Weather
- Contact Form
- Tips for Adding Widgets
- Conclusion
Content:
- Introduction
Widgets are a great way to add functionality and customization to your Google Blogger blog. They can be used to display social media feeds, recent posts, or even a live weather forecast. In this article, we will show you how to add widgets to your Google Blogger blog.
- Adding Widgets
To add a widget to your Google Blogger blog, follow these steps:
- Click on the “Layout” tab in the Blogger dashboard.
- Click on the “Add a Gadget” button.
- Select the widget that you want to add from the list.
- Click on the “Add” button.
The widget will be added to your blog’s sidebar. You can then customize the widget by dragging and dropping it to a different location, changing its size, or changing its settings.
- Recent Posts
The Recent Posts widget displays a list of your most recent blog posts. This is a great way to show your visitors the latest content on your blog.
- Archives
The Archives widget displays a list of your blog posts by date. This is a great way for your visitors to find old posts that they might have missed.
- Categories
The Categories widget displays a list of your blog posts by category. This is a great way for your visitors to find posts that are related to their interests.
The Social Media widget displays your social media feeds, such as Twitter and Facebook. This is a great way to connect with your audience on social media and drive traffic back to your blog.
- Live Weather
The Live Weather widget displays the current weather forecast. This is a great way to add a touch of relevance to your blog and provide your visitors with useful information.
- Contact Form
The Contact Form widget allows your visitors to contact you. This is a great way to get feedback from your readers and build relationships with them.
Tips for Adding Widgets
- When adding widgets, it’s important to keep your blog’s design in mind. Don’t add too many widgets, or your blog will look cluttered.
- Choose widgets that are relevant to your blog’s content. For example, if you have a blog about cooking, you might want to add a widget that displays your latest recipes.
- Experiment with different widgets and see what works best for your blog.

Conclusion
Adding widgets to your Google Blogger blog is a great way to add functionality and customization. By following the tips in this article, you can add widgets that will make your blog more informative and engaging.
Click here to sign up for Namecheap’s shared hosting and start promoting your blog today!
If you’re looking for more ways to customize your Google Blogger blog, I recommend checking out the Blogger Help Center: https://support.google.com/blogger/. You can also find a variety of widgets and themes available for free or for purchase.
I hope this article has been helpful. If you have any further questions, please feel free to contact me.

1 thought on “7 best Google Blogger ideas”